Bent Concrete Side Table

FOUR: CASTING CONCRETE

As the saying goes “timing is everything”.  To successfully cast this table you need to bend the concrete when it’s at the optimal “plastic” state. If you attempt to bend the concrete too early it’ll slump down the form into a pile of mess and if you wait too long it’ll crack at the curved points.

Step 1 – Prepare Casting Table

  • Make sure the casting surface is perfectly flat. Lay down a piece of plywood if necessary – any debris left under the rubber form will make a divet in the finished piece. If the surface isn’t level, the piece will be uneven in thickness.
  • Optional: Mount the table vibrator if you have one, but this isn’t necessary with D-FRC.
  • Get any wood supports or 5-gallon buckets that will support the bent rubber mold ready.
  • Check the rubber mold for dirt or debris and clean it out.
  • Mold Release: If the rubber molds are fresh, and this is the first time they’re being used, mold release isn’t necessary as long as it was used when initially casting the rubber. After that, spray the molds with a light dusting of Pol-Ease mold release.

Step 2 – Mix Activator and Pigment

  • Modifier: Add 1 gallon of Surecrete Xtreme Precast Modifier to an 8 gallon mixing bucket.
  • Pigment: Add 1 bag of CX SmartColor Pigment (Indigo used in the example) and blend slowly. Scrape the sides of the bucket with a trowel and blend once more.

Step 3 – Add Fiber-Reinforced Concrete Mix

  • Add the 50-lb. bag of Surecrete Xtreme Precast Mix and blend. Scrape the sides and bottom of the bucket with a trowel, making sure any unmixed material is blended.

Step 4 – Consistency for Casting

  • Add additional water if necessary, but the mix shouldn’t be too wet. After the mix is completely blended, move the bucket over to the form and get ready to cast.

Step 5 – Pour Concrete

  • Pour from one spot and let the concrete flow outward, then fill the remaining areas and level it off with your hands. Final thickness of this piece is 3/4″.
  • While filling the form, turn on the table vibrator or shake the form by hand to help chase air bubbles to the surface.

Step 6 – Bend

  • 20-40 Minutes: Temperature and humidity will have an effect on how long it takes for the fiber-reinforced concrete to enter a “false-set” (the point at which it can be bent). This piece was cast at 4:05 and bent at 4:45 in a 80° environment.
  • Test Bend: Lift one of the legs to check the consistency of the material. If it slumps down, it’s not ready. If it cracks at the bend, you’ve waited too long.

Step 7 – Bend and Cure

  • If you have a form made, you can drop the rubber mold down into it, or drape it over a form.
  • For this project, we quickly cut 4 pieces of plywood and screwed them to short sections of 2×4.
  • Each leg was held up while the plywood support was screwed in place. A screw through the rubber mold and into the support held the legs upright.
  • Minimize Vibration: Any vibration will cause the concrete to slump. Screwing the supports to the base board was not ideal. Using clamps, straps, or even duct tape will work just the same.
  • Cover with Plastic: Drape painter’s plastic over the piece to help keep the humidity inside while it’s curing.
  • Allow to cure 24 hours before demolding.
Previous: Cast Rubber Mold

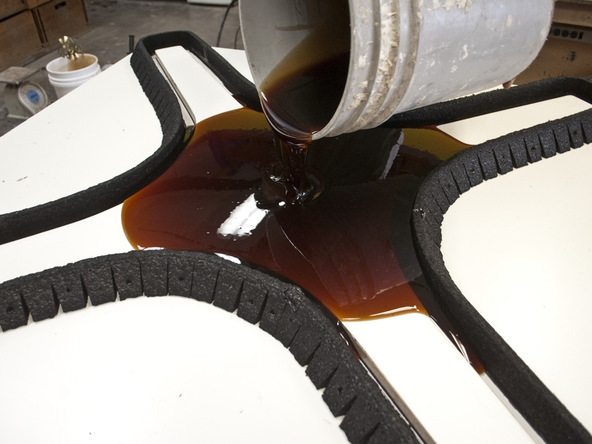
Polyurethane mold rubber behaves like glue and will stick to most materials, so make sure that all surfaces are protected with Pol-Ease Mold Release.

Next: Demolding

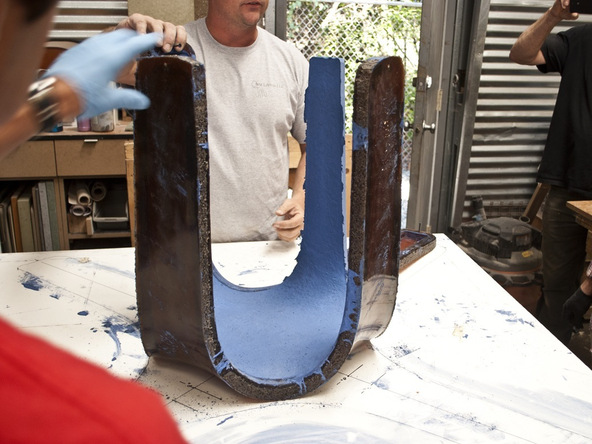
Wait 24 hours before attempting to demold this project. The legs will continue to be delicate until the concrete has reached full strength in seven days.