
Share This Post
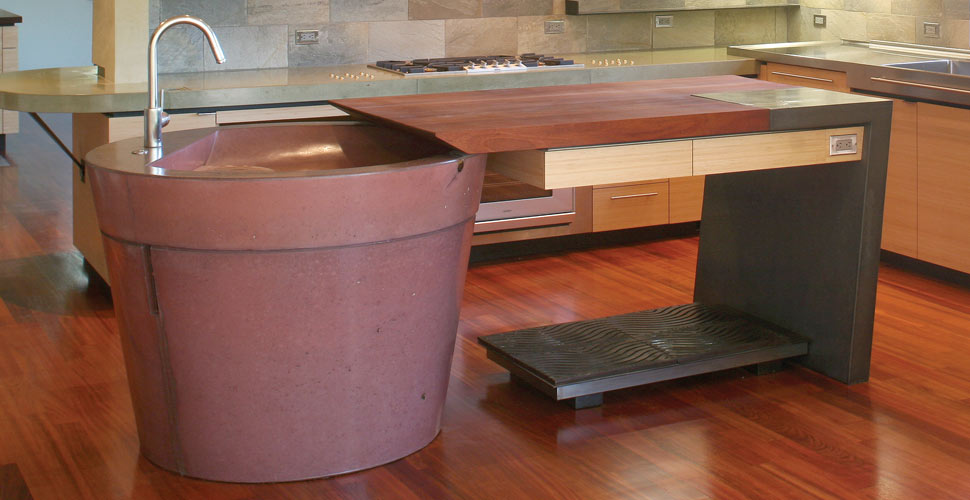
A Monolithic Sculpture and Functional Concrete Kitchen Island
A monolithic pour of a wall and countertop is an exciting and completely rewarding undertaking.
There is an undeniable impact when the wall and the counter it supports are fused into an integral, sculptural form. Working with concrete from a sculptural, rather than just functional, perspective elevates the value and emotional appeal of a project. Once you try it, you’ll never think of concrete as “just another countertop material” again.
In many ways, a concrete wall is simply a countertop turned on edge, so many of the decisions you’d make and techniques you’d use to design and fabricate a concrete countertop are also applicable to the wall. Like a countertop, a wall is poured into a mold, and whatever shapes, textures, or design elements you incorporate into your mold will be preserved in the concrete wall. The concrete wall provides many opportunities for simple, cost-effective design interventions that result in truly beautiful and sculptural effects.
Walls vs. Countertops: Structural Differences
But a wall differs from a countertop in several important ways. First, weight can be a challenge. A 2.5-inch thick floor or countertop spread across many square feet doesn’t excessively tax the subfloor; but with a wall, that same weight is concentrated over a much smaller number of square feet. Because walls have such small “footprints,” special care must be taken to ensure that they have the proper support. If you’re pouring your wall on a slab on grade, you don’t need to worry about reinforcing the floor; but if you’re planning to pour a wall over a wooden subfloor (common in remodels), you’ll need to consider the wall’s weight in relationship to the floor’s strength (remembering that a cubic foot of concrete weighs about 140 pounds, and a yard about 3,780 pounds).
Consider the orientation of the wall to the floor joists. The weight of a wall that runs perpendicular to the joists will be distributed more effectively than that of a wall running parallel to the joists. To support your wall, you may want to consider pouring a concrete footing below the subfloor or pouring a series of footings that penetrate the subfloor and tie directly into the wall.
Another way to lighten the load is to use lightweight aggregates, hollow walls, or both. Lightweight aggregates can reduce the weight of concrete by as much as 30 pounds per cubic foot, but even this may not be light enough for your floor. Building a hollow wall lessens the weight of the wall even more (we use rigid foam wrapped around a hollow wood frame, with rebar or remesh attached directly to the foam), but it also weakens it. Therefore, be cautious in your calculations so as to ensure that your wall can support your countertop.
If your wall functions as a bearing wall, you may want to enlist the help of a structural or civil engineer. An engineering report will specify such things as the amount and placement of rebar, the spacing of the rebar, and the minimum compressive strength of the mix. (Our NeoMix concrete countertop mix is designed to meet or surpass requirements for all but the most extreme applications.)
Finally, there’s the matter of the structural integrity of the formwork itself. Unlike the form for a countertop, the form for a wall must withstand massive forces. The height of a wall, not the thickness, determines the pressure on the form, and the pressure rises exponentially with every additional inch of height. Just about everyone who works with concrete on a regular basis will have at least one horror story about a form that distorted from the force of the concrete or that blew out entirely—to avoid this, you must brace your form.
Bracing the Wall Form
There are two basic ways to brace a form: You can either use form ties and external bracing or external bracing alone. Form ties work by tying the form’s two sides together, acting as a tension member between the walls of the form. They are the most efficient and effective way to ensure a trouble-free pour day, but there is a downside: They leave behind a hole or, depending on the type of ties used, a series of metal or plastic tabs.
We sometimes use a form tie of our own design that leaves behind a clean hole that completely penetrates the wall, which we might leave open or fill with different colored concrete or objects such as glass marbles. The custom tie consists of a 5/8-inch PVC pipe, cut to the width of the form and scored along its side, and a length of 1/2-inch threaded rod. The rod is slipped through the PVC and the form boards and is secured with bolts at each end. Once the form boards are pulled off, the PVC pipe knocks out easily because the saw cut allows it to collapse or give.
Although a wall can be braced externally without form ties, form ties shouldn’t be used without external bracing, as only external bracing can keep the form walls from toppling over during the pour. An advantage to using external bracing alone is that it’s “invisible,” leaving no artifacts such as holes or tabs behind. But the risk of failure is greater when external bracing is used alone, and the form can also be costly and time consuming to build as well as difficult to install without form ties, so the combination of methods may be your best bet.
Form Materials and Finished Surface Texture
As with countertops, the materials you use for the form will directly impact the piece’s finished appearance. (As is also the case with countertops, be careful to place rebar no closer than 1 inch from the face of the wall to avoid ghosting—a slight discoloration directly over the rebar.) Melamine is a useful material for form-making as it is relatively inexpensive and releases easily from concrete. The tremendous pressure inherent in a wall pour helps re-create the surface or texture of the form it’s poured into. Concrete poured into wall forms with slick surfaces can be very shiny without the need for additional polishing (unlike countertop pours that yield very inconsistent, sometimes blotchy surfaces).
Experiment with materials to find the texture you like. Try forms made of wood or other materials, or try a prefabricated form liner. Most commercial form liners are designed to create patterns that disguise concrete, making it look like brick, tile, or wood. You can also experiment with inserts and inlays (fixing them firmly to the vertical surface) or even “found” form liners like bubble wrap or corrugated fiberglass siding.
Final Considerations: Mix, Pour, Finish
We use the same basic mix design (our NeoMix formulas) for walls as we use for countertops. Because walls require such high volumes of concrete, using integral color in a wall pour can be quite expensive. (This is why we usually restrict integral color to our high-profile installations.) If you’re after color, acid stains are a possibility.
With an integral countertop-and-wall pour, there is a large exposed surface area to finish by hand during pouring, and it is handled just like a poured-in-place slab. The trickiest part of pouring a wall is that the wall forms might just fail under the extreme stress of the wet concrete, so always keep an eye out for signs of danger. In addition, be careful not to let the vibrator get too close to the surface, as this causes discoloration.
The longer you leave concrete undisturbed in a melamine mold, the harder and smoother the finish will be. For the hardest finish we’ll leave the forms on for at least ten days. If you pull off the forms any sooner (while there is still water evaporating from the surface of the concrete), the finish will appear dull even though it may still be quite smooth to the touch.
Combining walls with countertops is an opportunity to interpret design and function with new forms, looks, and perspective. This approach might result in a cantilevered eating counter, an integral, three-dimensional sculptural mass, or something else entirely—just be sure to consult with an engineer if you get ambitious.
Most importantly though, be creative and have fun making a truly signature piece!
Share This Post