
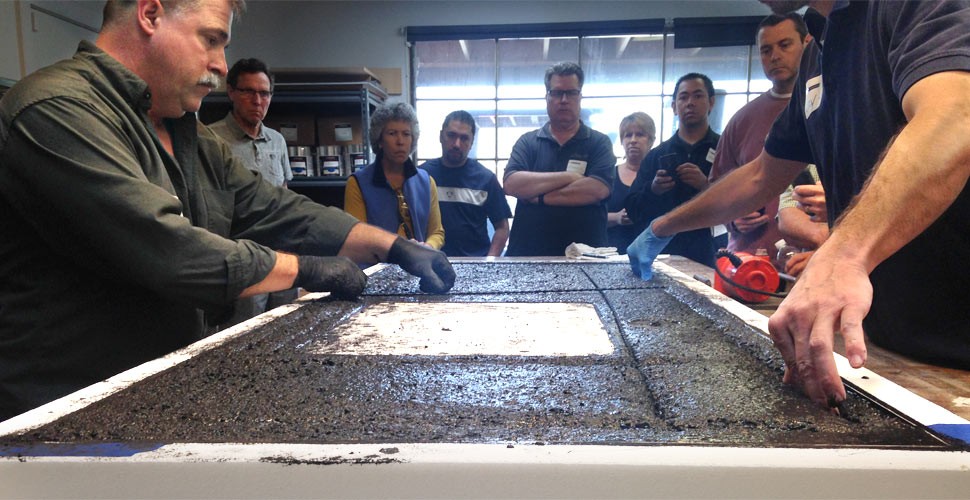
Once again, thank you to everyone who participated in yesterday’s concrete countertop casting demonstration. It was great having so many of you there with a lot of really good questions.
Share This Post
For those who couldn’t make it to yesterday’s session, we’ve pulled together a few photographs and videos from the class so you can follow along.
In this weekly series of demonstrations we’re using many of the innovative concrete countertop products available at Concrete Exchange Online Store. Last week we started this project by building the countertop form for a set of cabinets at our store. This weekend we spent a lot of time discussing CX Pro-Formula Concrete Countertop Mix, Decorative Aggregates, and Basalt Rebar.
A Well Constructed Mold is Critical To Success
The Demonstration started with a review of everything we covered last week and a discussion about the use of decorative inlays and aggregates.
 Decorative Inlays Set Concrete Above All Other Countertop Options
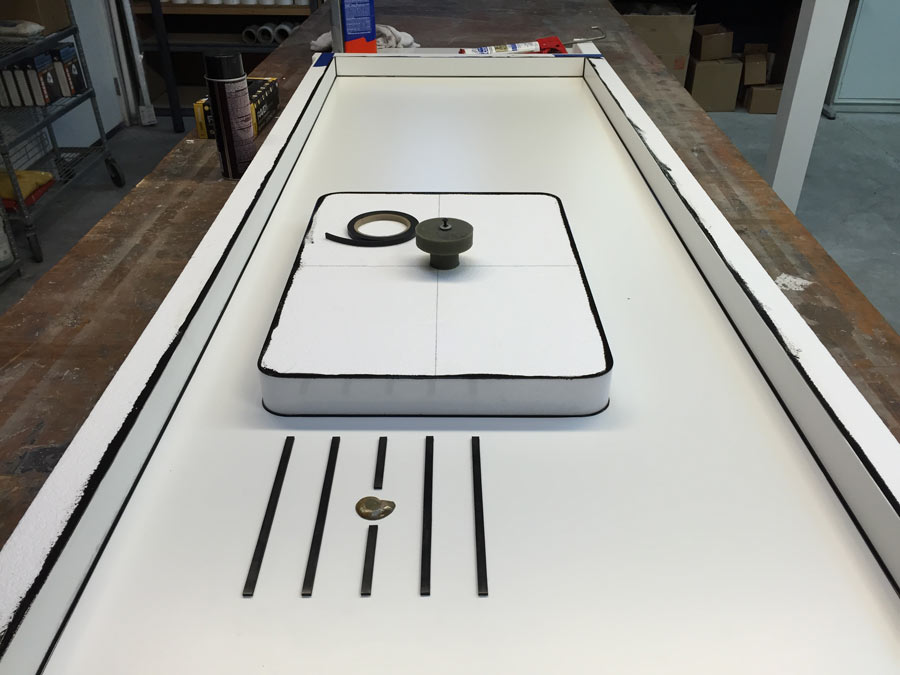
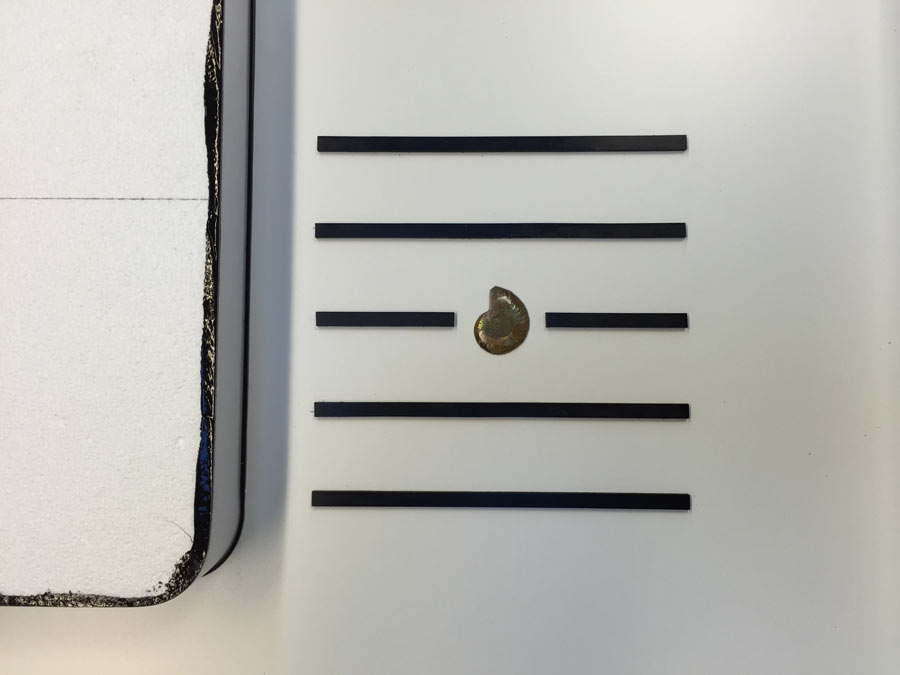
A set of 6 rubber knockouts for trivet strips are placed next to the sink using 3M Super 77 Spray Adhesive. The rubber strips will be removed after polishing the concrete countertop surface leaving shallow channels in the countertop surface where we’ll place 1/4″ metal key-stock as protective trivets next to the sink.
The split-faced and polished ammonite was also adhered to the form surface using 3M Super 77 Spray Adhesive. You can learn more about placing Ammonite fossils by following this link to an instructional guide that goes into greater detail about ammonite selection and placement.
 Decorative Aggregates Bring Customization to Concrete Countertops
For this project we want to see blue, green, and black aggregates on the surface of our finished countertop so we’re placing hand selected aggregates directly onto the casting surface. To ensure the decorate aggregates stay in place against the form, a very fine misting of 3M Super 77 Spray Adhesive is sprayed into the bottom of the mold before broadcasting the decorative aggregate. The spray adhesive provides just enough stick to prevent most of the decorative aggregates from being forced away from the surface of our casting up into the mix. We chose to use small crushed cobalt blue glass, jade, and crushed black glass for this project.
Only use a thin layer of adhesive. Thick coatings will create unwanted “low-spots” in the surface of your finished concrete countertop that require a lot of grinding to remove.
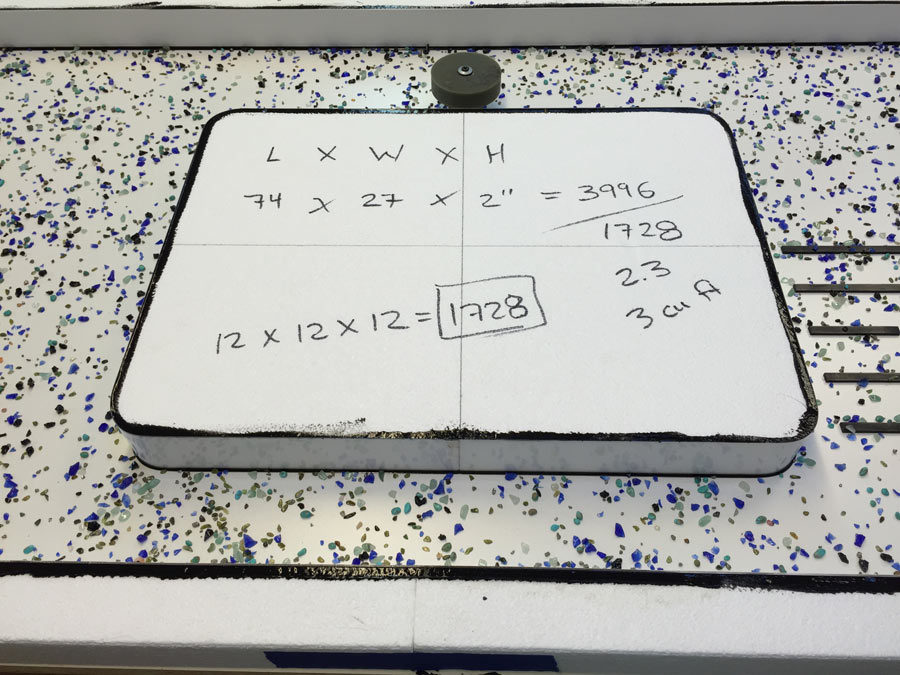 Do The Math And Make Sure You Mix Enough Concrete To Fill The Mold
Final preparation before mixing our concrete included setting a rubber faucet knock-out for the faucet fixture at the center of the sink. This knock out will eliminate the need for drilling holes into the countertop after casting and also make it possible to use standard faucet fixtures with a 1-1/2″ threaded stem.
Now it’s time to calculate how much concrete to mix for this concrete countertop project.
- Calculate the volume by multiplying the 74″ length x 27″ width x 2″ height = 3,996 in3.
- Convert to cubic footage by dividing 3,996 in3 by 1,728 in3 = 2.3 ft3 (1,728 in3 = 1 ft3).
- Round up to the nearest whole cubic foot = 3 ft3.
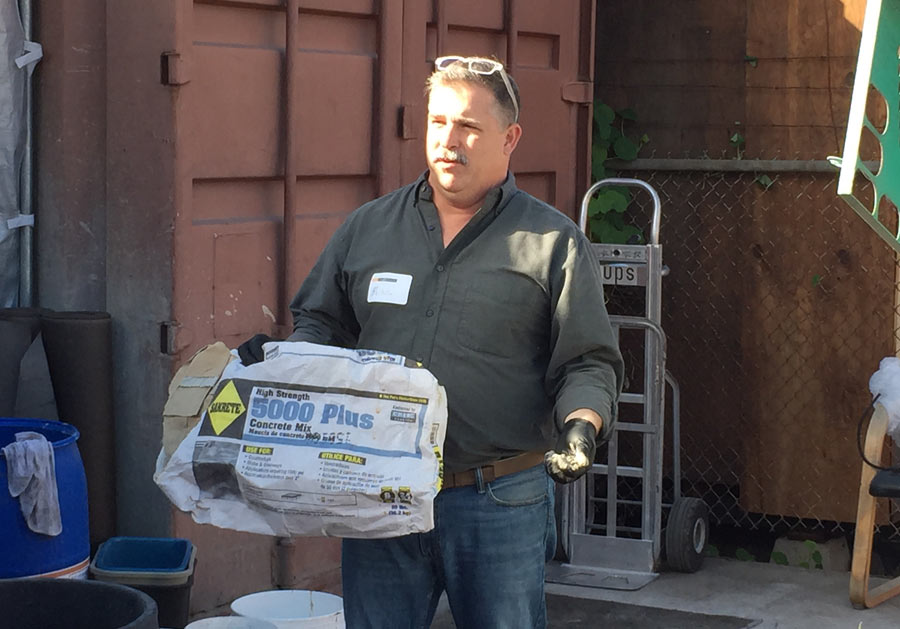 Sakrete 5000 Plus Concrete Is Our Mix Of Choice
Mixing the concrete is my favorite part of every training. It’s where things get really fun! To make 3 cubic feet of concrete for this project we’ll use 3 packets of CX Pro-Formula Concrete Countertop Mix and 360 pounds of Sakrete 5000 Plus.
People ask us why we use Sakrete 5000 Plus, and there’s one easy answer — we care how good the concrete looks. Several years ago Sakrete approached Concrete Exchange and asked us what the decorative concrete industry needed in a bagged concrete mix. Our collaboration with Sakrete resulted in the creation of this high-cement content mix that, unlike other concrete mixes, doesn’t contain additives, fillers, and fly-ash that affect the pigment saturation rates and final appearance. Sakrete 5000 Plus is a pure concrete mix made only of sand, aggregate, and cement and that’s why Concrete Exchange proudly endorses it.
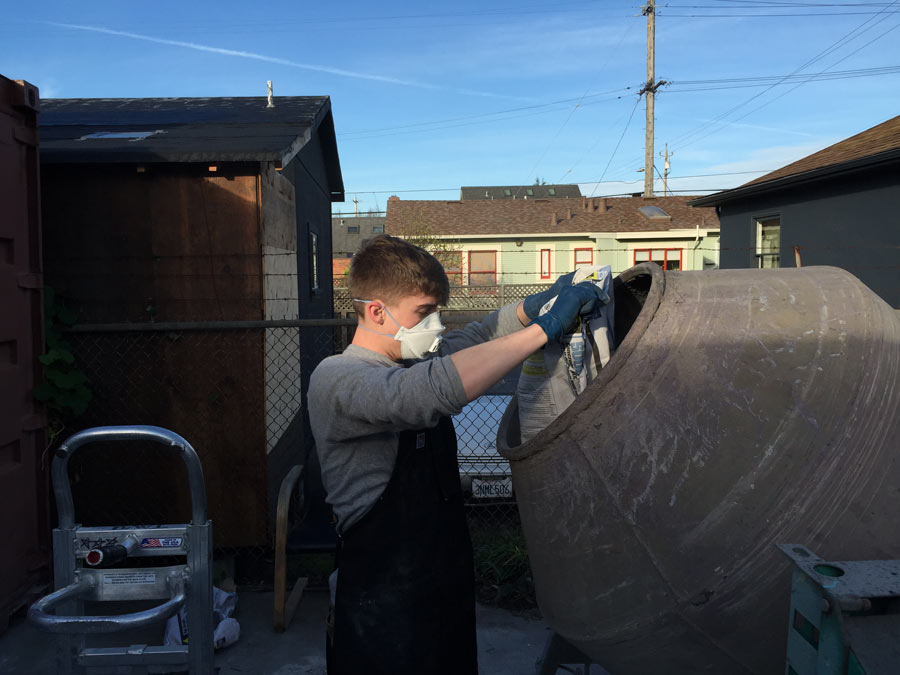 A Reliable Concrete Mixer Ensures Every Pour Runs Smooth
After Ben loaded 360 pounds of concrete into the mixer, we added three packets of Pro-Formula Concrete Countertop Mix, and turned the mixer on for 5 minutes to ensure the dry ingredients were thoroughly blended.
Pro-Formula Concrete Countertop Mix adds color and enhances the performance of Sakrete’s 5000 Plus by shortening the cure time from 15 days to 4 and increasing the hardness to allow higher-gloss polishing. Pro-Formula’s palette of 18 custom colors is inspired by mother nature and recognized for its timeless appeal. Since 2003, people around the globe have been pouring countertops using Pro-Formula Concrete Countertop Mix. You can see many of their creations in the Concrete Exchange Design Gallery.
While the concrete was dry-mixing we talked about the different sizes of concrete mixers. For a 3 cubic foot pour like this, we recommend using a 9 cubic foot concrete mixer. The 14 cubic foot mixer we borrowed was technically too big for our pour.
If we were installing this project outdoors, we’d have used the CX Pro-Formula All-Weather for its superior fade and freeze damage resistance.
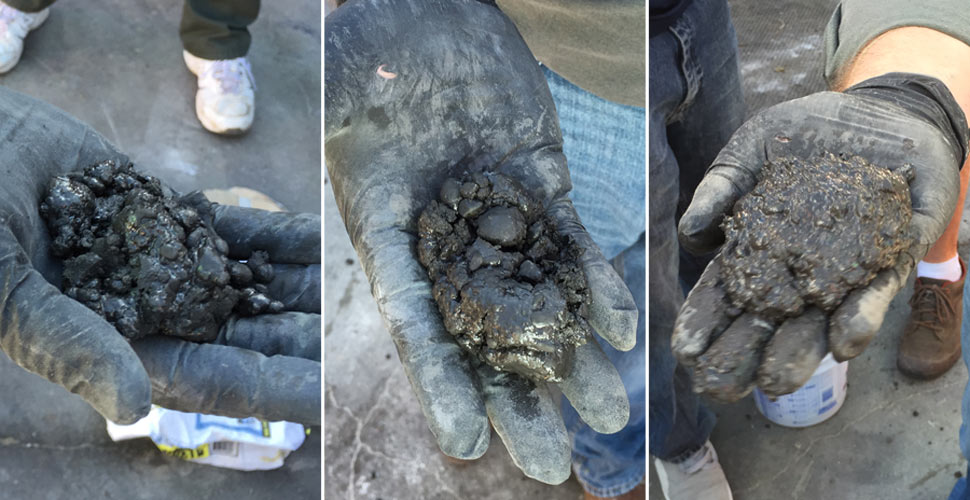 Too Dry, Still Too Dry, Just Right
Once the mix was thoroughly dry-blended, we added 2-1/2 gallons of water to the mixer. After 5 minutes we slowly added more and more water until the concrete mix was nicely workable and could run between my fingers under vibration. In the end, we used 3-1/4 gallons of water to create a workable batch of concrete.
Each bag of concrete will have slightly different water requirements which is why we started off with only 3/4 of the anticipated amount of water and slowly add the remaining water.
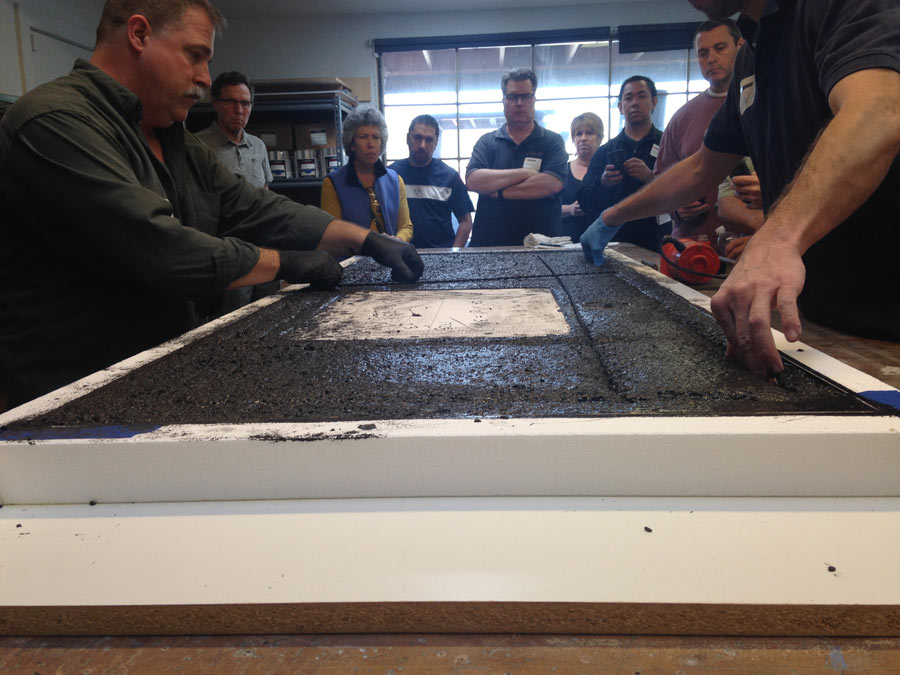
 Gently Cover The Bottom Of The Form Before Starting The Vibrators
Can you guess what color we’re using for this countertop? That’s right, Charcoal Pro-Formula Concrete Countertop Mix — The most popular Pro-Formula color. The concrete mixture is gently placed in a 3/4″- 1″ layer on the bottom of the mold before the vibrators are on to avoid displacing the decorative aggregates and “snow-plowing” them into corners and against edges.
The video below was shot to give you a better perspective on the concrete consistency and rate of placement into the mold. The video also shows you how we use the table vibrators at different frequencies to accomplish different objectives along with the placement of Basalt Rebar.
We turn the vibrators on high speed once the form-base is entirely covered in concrete, and quickly fill the mold before dialing the vibrator down to a lower frequency. High frequency vibration liquifies the concrete for better flow into corners and around inlays, while low frequency vibration drives the air out.
 Basalt Rebar Adds Strength To Prevent Cracks
Basalt Rebar was placed into the back-side of the concrete countertop to provide extra structure around the front and back of the sink knock-out. We placed the rebar approximately 3/4″ from the top of our form.
Basalt Rebar is our top reinforcing pick for many reasons:
- It’s the same density as concrete so it won’t sink to the bottom or float to the top of our pour.
- It will never rust or degrade from alkali attack, making it ideal for even the harshest marine environments.
- It’s light 92% lighter than steel.
- It’s strong. 3mm basalt rebar is equivalent to 3/8″ steel rebar.
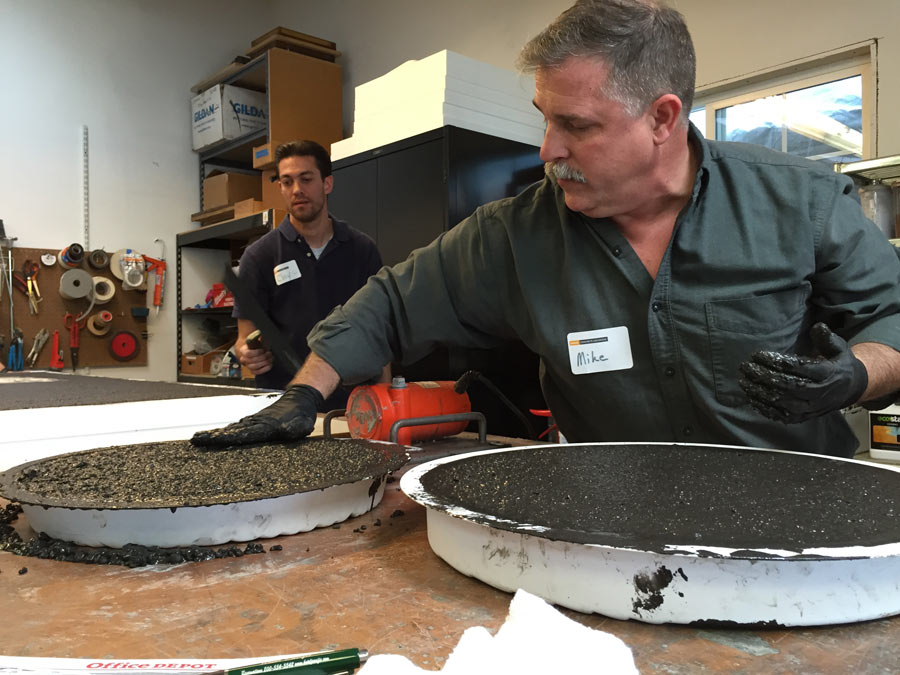 What to Do With Left Over Concrete?
After the concrete countertop was poured we had just enough concrete to fill two stepping stone molds. If you’re building concrete countertops as a business we always recommend using your extra concrete to fill cast samples to give away as sales tools.
This is where we wrapped up today’s demonstration, but we will resume this concrete countertop project on March 28th, when we’ll continue with polishing the countertop we cast today.
UPDATE: The 3/21 GFRC casting demonstration and 3/28 concrete countertop polishing demonstrations are now full.
Share This Post