Rhomba Concrete Bench

ONE: FORMING

Use high quality materials when building this form to insure the form can be reused for multiple castings. The form constructed for this how-to guide was used to cast more than twenty Rhomba Bench Cubes. Take precautions to avoid scratching or chipping the form pieces when demolding the cubes to maintain a high quality finish on each casting.

What You’ll Need
  • Cordless Drill
  • Pre-Drill and Countersink Bit
  • Corner and Seam-Shaping Tools
  • 100% Silicone Calk
  • Razor Blades
  • Chip Brush
  • GFRC Rhomba Bench How-To Drawings
  • 3/4″ Melamine
  • Contact Adhesive
  • Laminate
  • Drywall Screws

Step 1 – Construct the Form

  • The form is built from 3/4″ melamine-coated particle board.
  • The constructed form is essentially a box with top “caps” on top of the walls. Three pieces inside that create the recessed ledge for the wooden bench top. See the GFRC Rhomba Bench How-to-Drawings for the complete dimensions and cut list.

Step 2 – Glue Up the Knockouts

  • The knockouts are made from 3/4″ melamine and faced with laminate to hide the seams and provide a waterproof surface.
  • The knockout is made in 3 parts. Each part is screwed into the form walls. This way each part of the knockout can be removed separately.

Step 3 – Secure Knockout

  • Install the knockout at the bottom of the form by pre-drilling, from the outside, through the form walls and screwing in each section.

Step 4 – Seal the Form

  • Attach the top cap by screwing it into the form walls.
  • Seal the form with 100% silicone.
  • After the form is sealed, cured, and cleaned up, it’s ready for Casting.
Next: CastingRhomba Concrete and Wood Bench - Casting | Concrete Exchange

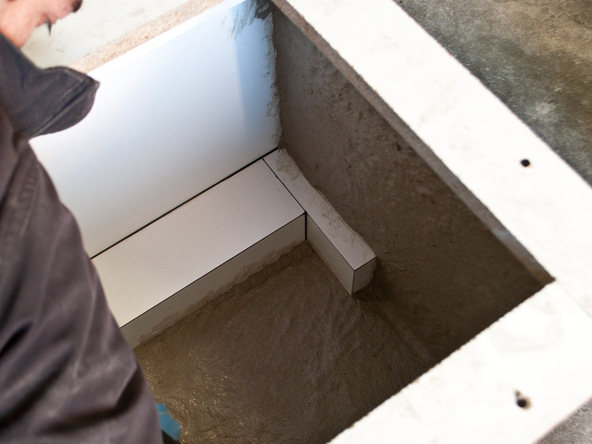
We prefer to hand place the fiber reinforced concrete mixture onto horizontal surfaces and allow a few minutes for the recently placed…