
How to Seal a Concrete Countertop Form
This is one of the best kept secrets to making a beautifully crafted concrete countertop. Properly sealing a concrete countertop mold with silicone window and door sealant will create rounded edges that are smooth, consistent, and controlled.
What You’ll Need
- Corner and Seam Shaping Tools
- Caulking Gun
- 100% Silicone Window and Door Sealant
- Paper Towels
- Razor Blades
- Denatured Alcohol
Step 1 – Clean the Form
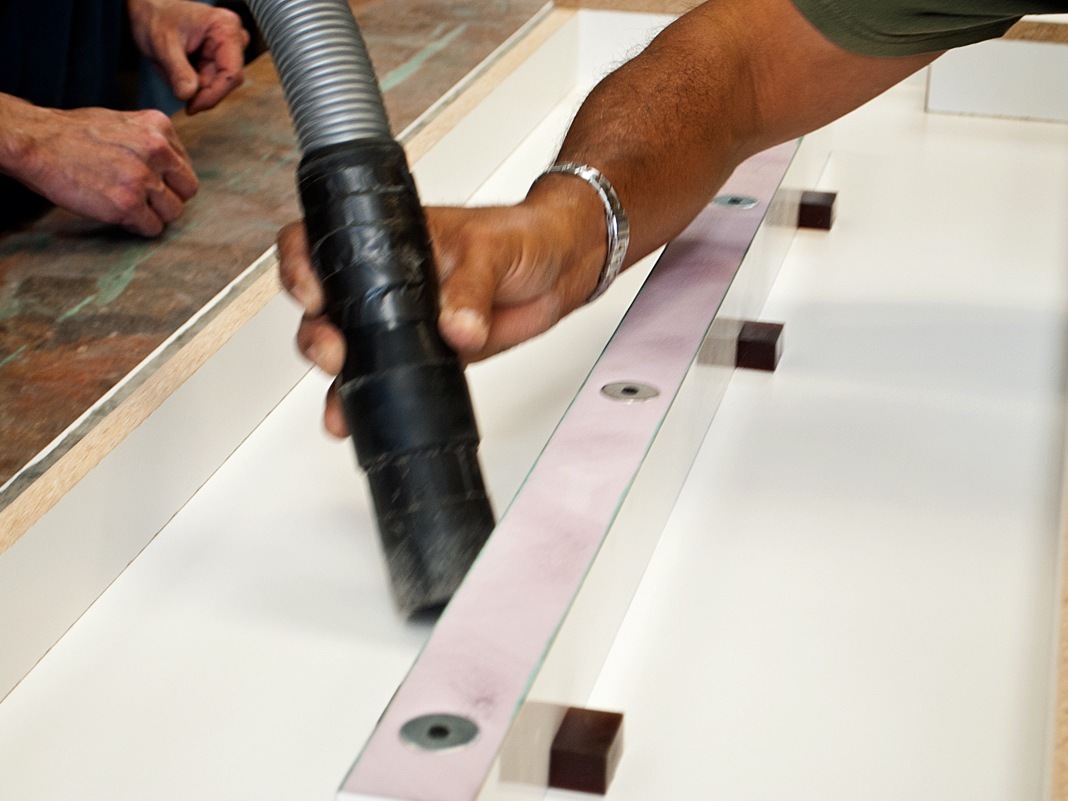
- Remove all dust or debris from the form paying close attention to the corners and edges.
- While the silicone sealant is wet we want to make sure that no loose debris gets stuck in the finished surface. If dirt gets trapped in the silicone while it’s curing, it will show in the finished concrete, so make sure the form is as clean as possible.
- A high-quality shop vacuum is ideal for keeping your forms and work area clean and free of unwanted dust particles.
Step 2 – Select the Correct Sealant
- It is important to use 100% silicone caulk. Other sealants may work to seal the form but they won’t provide the smooth flawless finish that we are looking for. Many sealants can stain the concrete you’re casting, or in extreme cases, bond to the concrete.
- We recommend the GE brand of 100% silicone found at most home improvement centers and labeled as window and door sealant. We’ve been using this sealant to seal our molds for more than a decade and have never had a problem it.
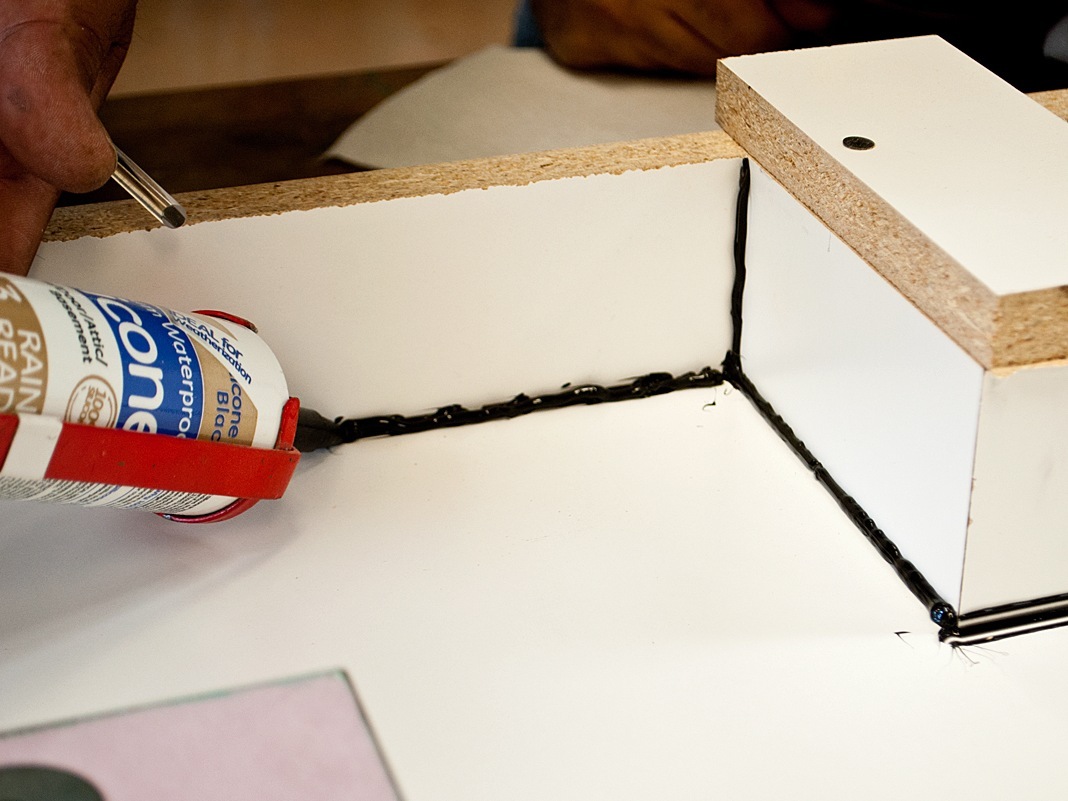
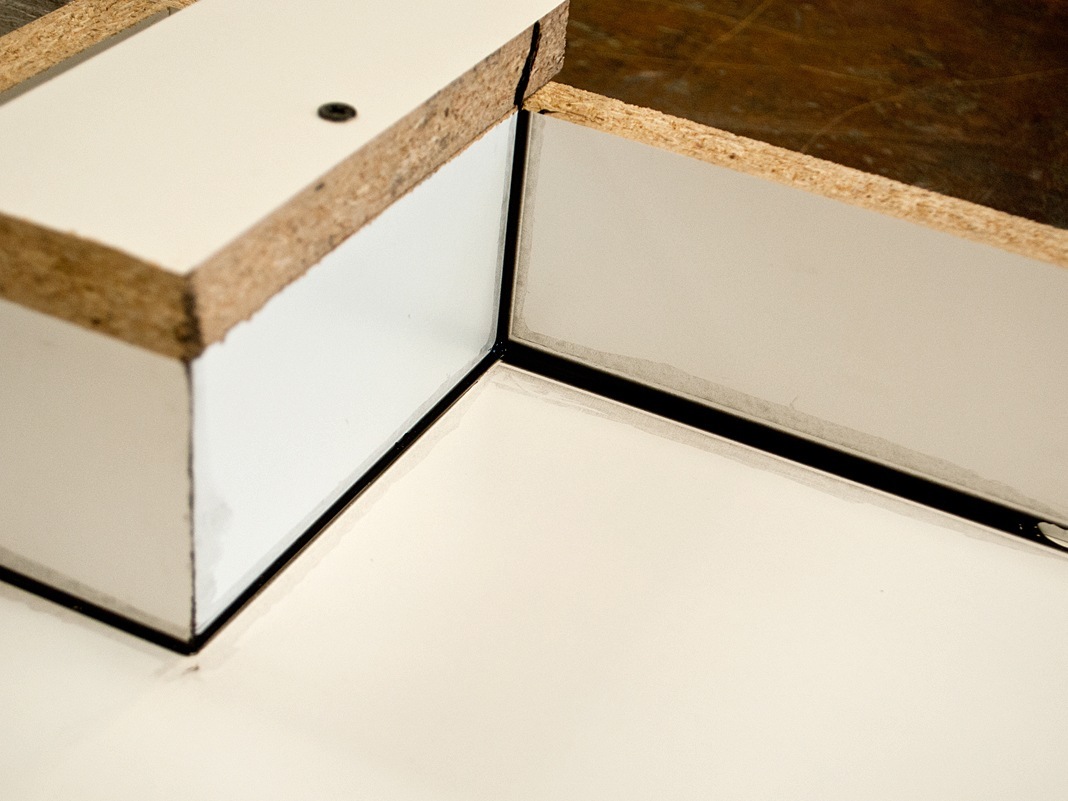
- Choose a colored silicone that will contrast with the color of your concrete countertop formwork. If you’re using white melamine — select black silicone and if your melamine is a dark color — select white. This will make it easy for you to see where there is excess material to clean up.
Step 3 – Select the Right Shaping Tool
- The size of the round-over you create in the finished concrete is up to personal preference, but beyond aesthetics, here are a few guidelines to consider:
- 5/8″ – Use a large round-over for the softest edges.
- 1/2″ – This is a versatile size and is good for countertop edges.
- 3/8″ – This is probably the most used size in our fabrication shop, and this is typically the size we use on countertop forms.
- 1/4″ or less – Use the smallest round-over for caulking tight areas. Sometimes it’s just not possible to use anything larger. If you’re making a countertop with a seam where two pieces will meet, using the smallest round-over will make the seam less obvious and more crisp. This size is also very good for use around artwork or embeds.
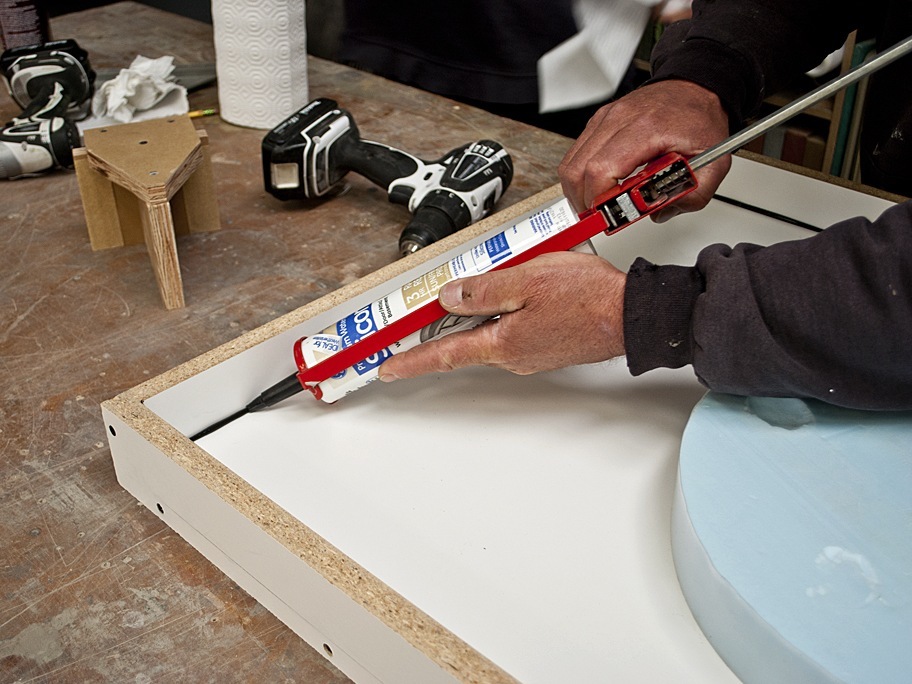
Step 4 – Tool the Silicone
- Throughout this process you want to use only fresh silicone. Even silicone in the nozzle will start to cure, and after a few minutes the silicone forms a “skin”, making it difficult to tool. Work in small sections, and don’t rush, but work briskly and confidently.
- First, cut the nozzle of the silicone tube open toward the end. The size of the hole in the nozzle depends on the size round-overs you’re going to make.
- Work in small areas, because this needs to be done before the silicone starts to gel up and cure.
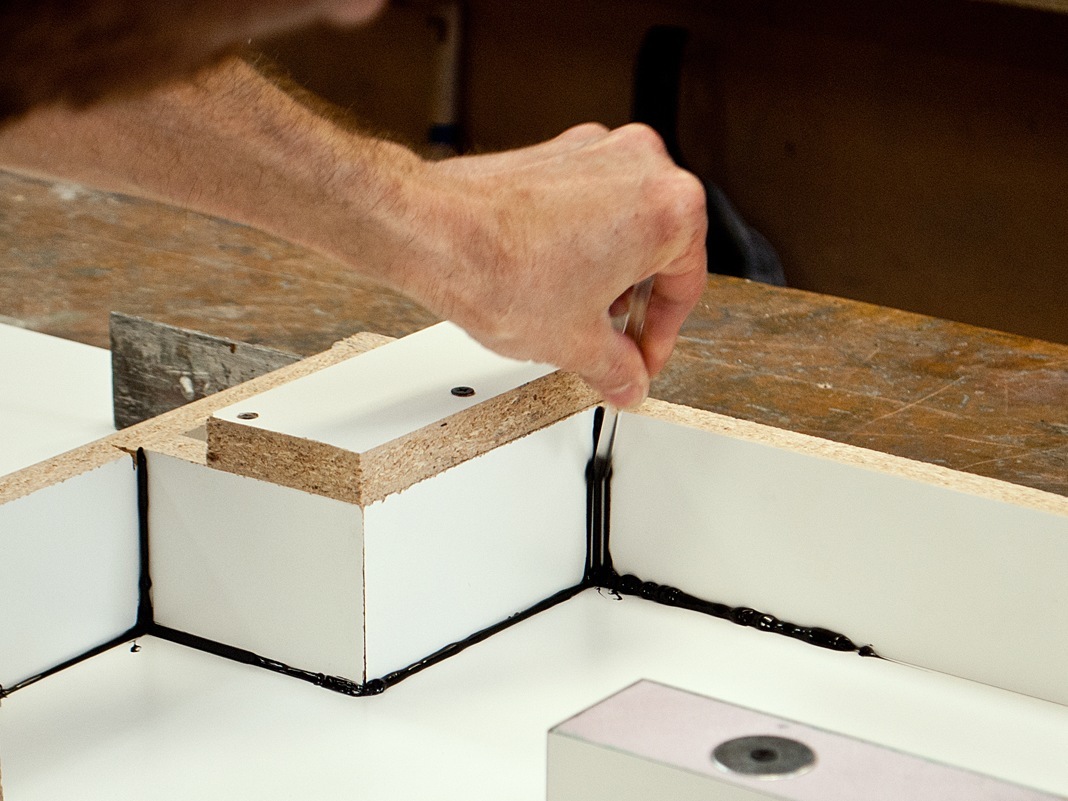
- Begin by squeezing silicone into the vertical edges, then do the horizontals. The neater and smoother you can do this, the better. Use fluid motions and don’t start or stop or squeeze too much – just a small bead of silicone is all you need.
- Start by tooling the vertical edges in the section you’re working on. Begin about 1/8-1/4″ from the bottom of the form, press the tool firmly in the corner, and drag upwards in a fluid motion.
- Use enough pressure to keep the tool in the corner and create the round-over, excess silicone will be pushed away, and the tool will create the white lines that will make it easy to clean up. Creating crisp white lines is key.
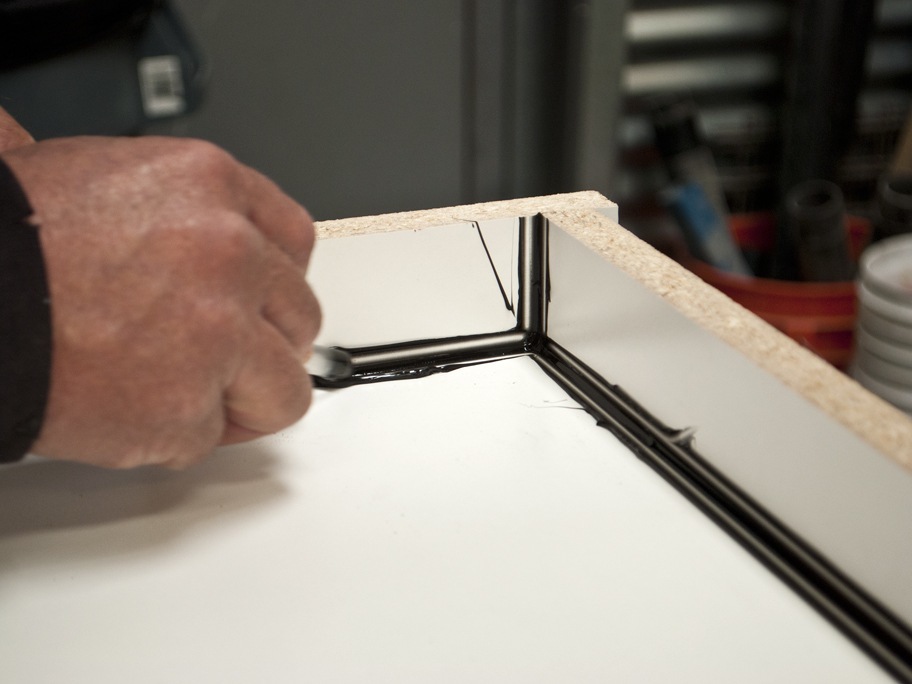
- Work from that corner outward, repeating the same steps, cleaning your tool every time with a paper towel, and moving in long, fluid motions. At the end of your motion, lift the tool as lightly away from the silicone as possible. Lifting abruptly will leave a mark in the silicone, and even small mistakes will be visible in the finished concrete.
- The corners are the hardest part, making the white lines meet up perfectly takes practice. Do it once and with confidence. The more you go back over the silicone, the worse it will get as the silicone starts to cure, so at some point you just have to leave it alone.
Step 4 – Tool the Silicone
- Start by tooling the vertical edges in the section you’re working on. Begin about 1/8-1/4″ from the bottom of the form, press the tool firmly in the corner, and drag upwards in a fluid motion.
- Use enough pressure to keep the tool in the corner and create the round-over, excess silicone will be pushed away, and the tool will create the white lines that will make it easy to clean up. Creating crisp white lines is key.
- Work from that corner outward, repeating the same steps, cleaning your tool every time with a paper towel, and moving in long, fluid motions. At the end of your motion, lift the tool as lightly away from the silicone as possible. Lifting abruptly will leave a mark in the silicone, and even small mistakes will be visible in the finished concrete.
- The corners are the hardest part, making the white lines meet up perfectly takes practice. Do it once and with confidence. The more you go back over the silicone, the worse it will get as the silicone starts to cure, so at some point you just have to leave it alone.
Step 5 – Scrape Away Excess
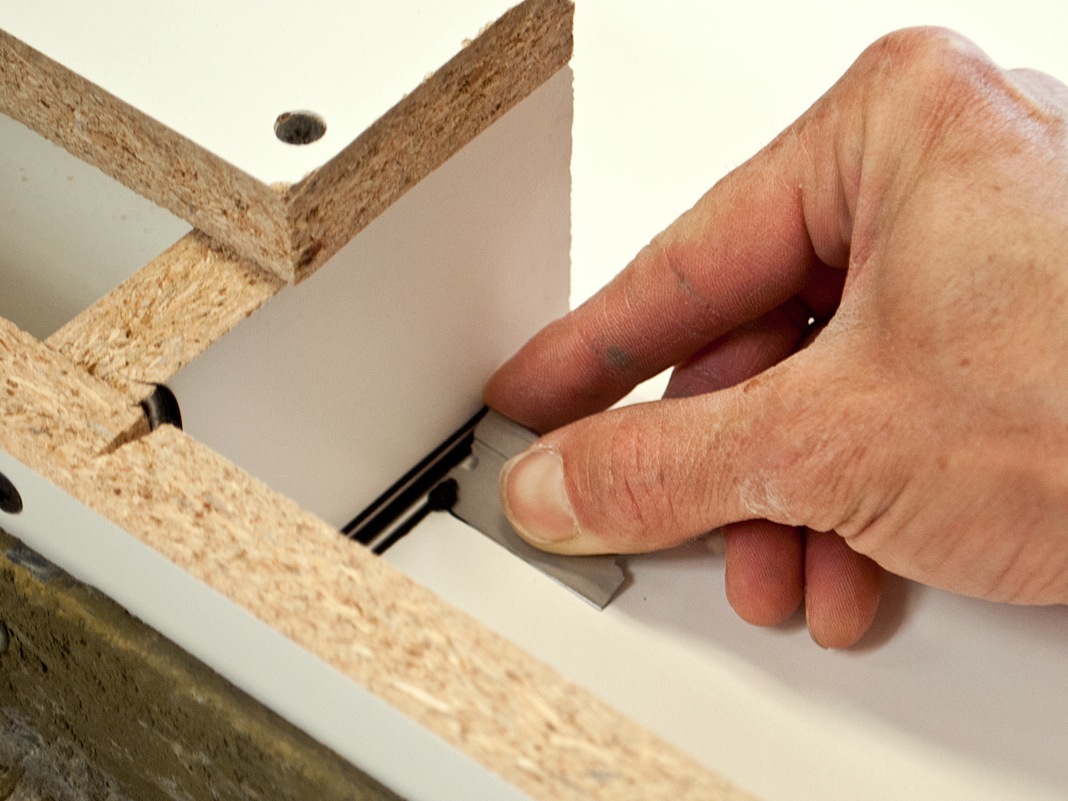
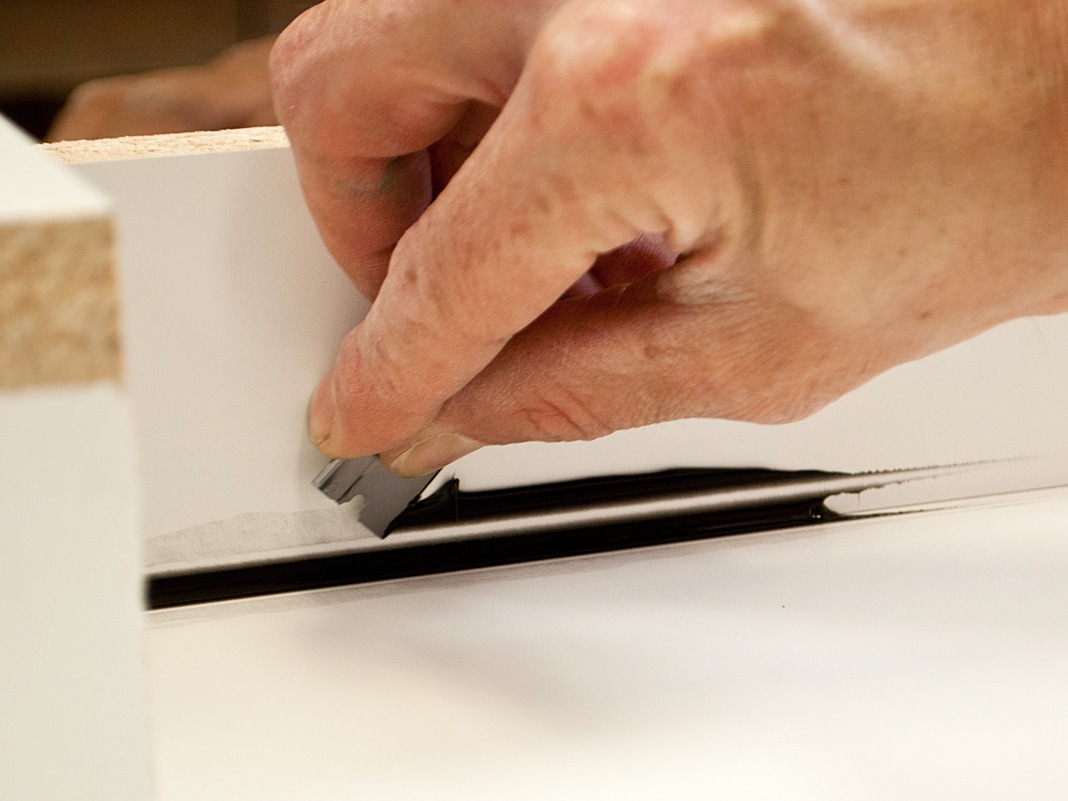
- After the form is caulked, scrape away the excess silicone with a fresh razor blade. A razor blade has two different bevels, slide the razor blade across the bottom of the form and find the side that glides more smoothly. Use this side to cut into the silicone (just like shaving).
- Clean the razor blade after every pass with a paper towel. Take your time cleaning up the excess, one false move and you could ruin the nice round-over you created.
- We remove the silicone this way in the shop because it saves time, but if you let the silicone cure for a few hours, the excess will peel right up.
Step 6 – Clean Up with Denatured Alcohol
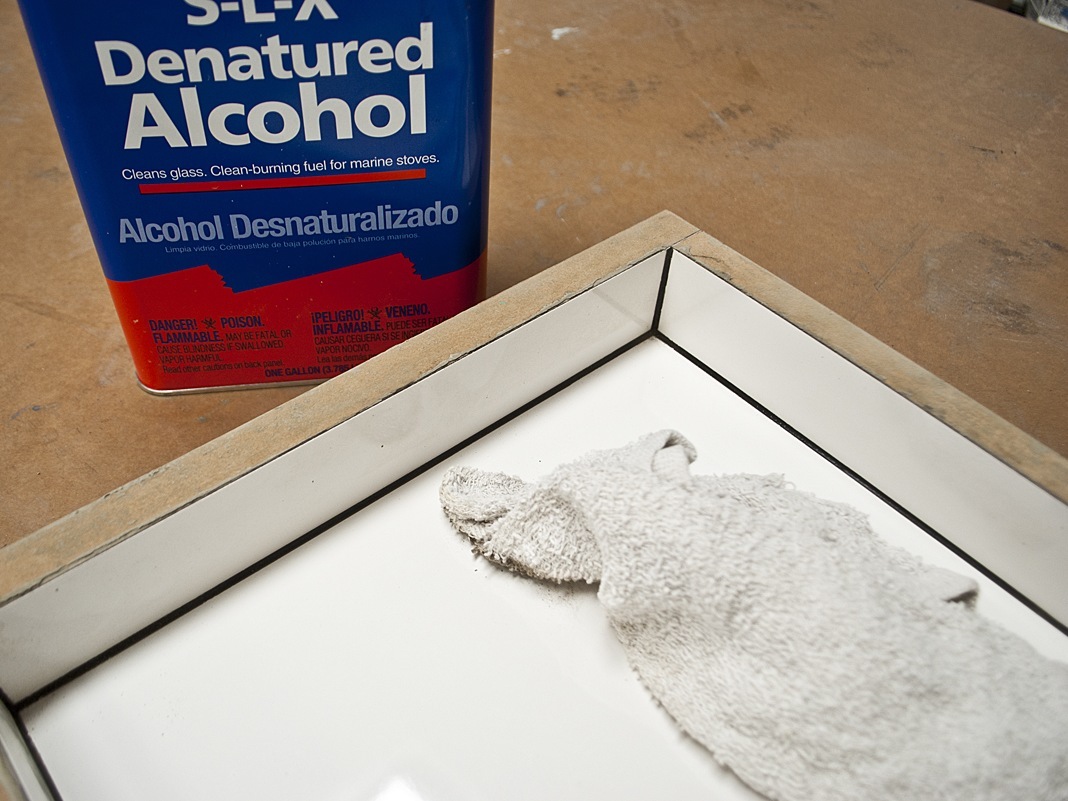
- Wait for the silicone to fully cure before cleaning up the leftover residue that is stuck in the texture of the melamine. This is easy to do by rubbing it away with your fingers and by using denatured alcohol.
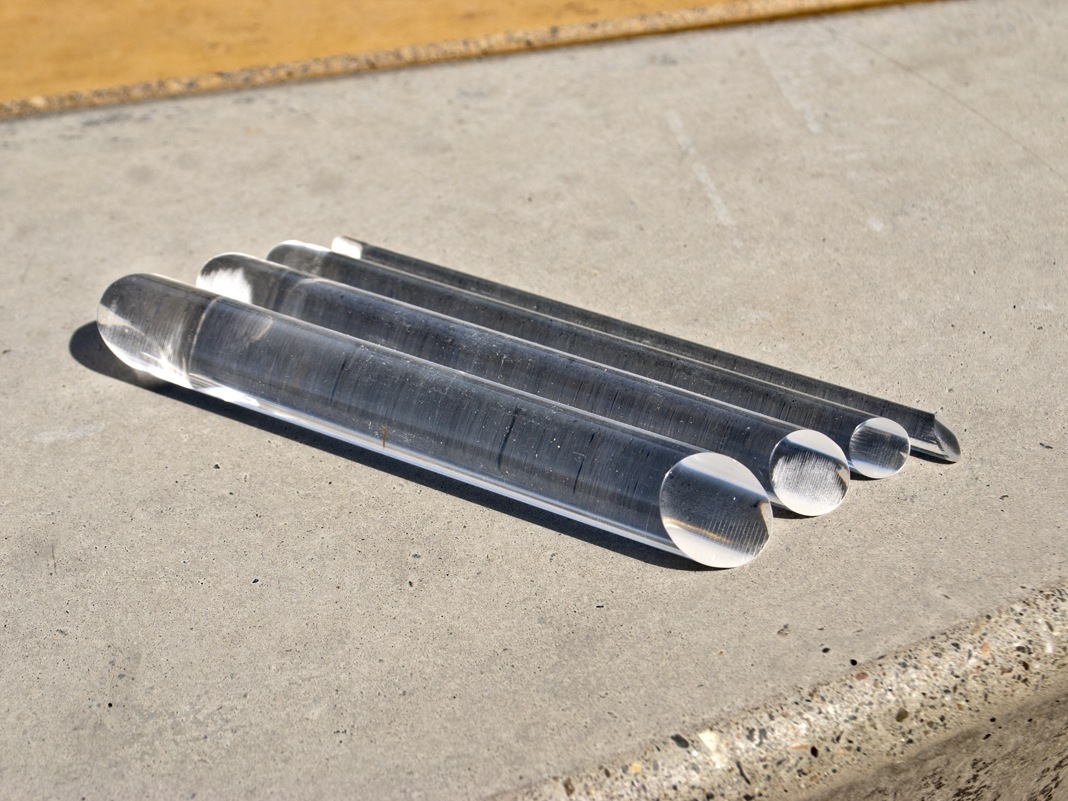
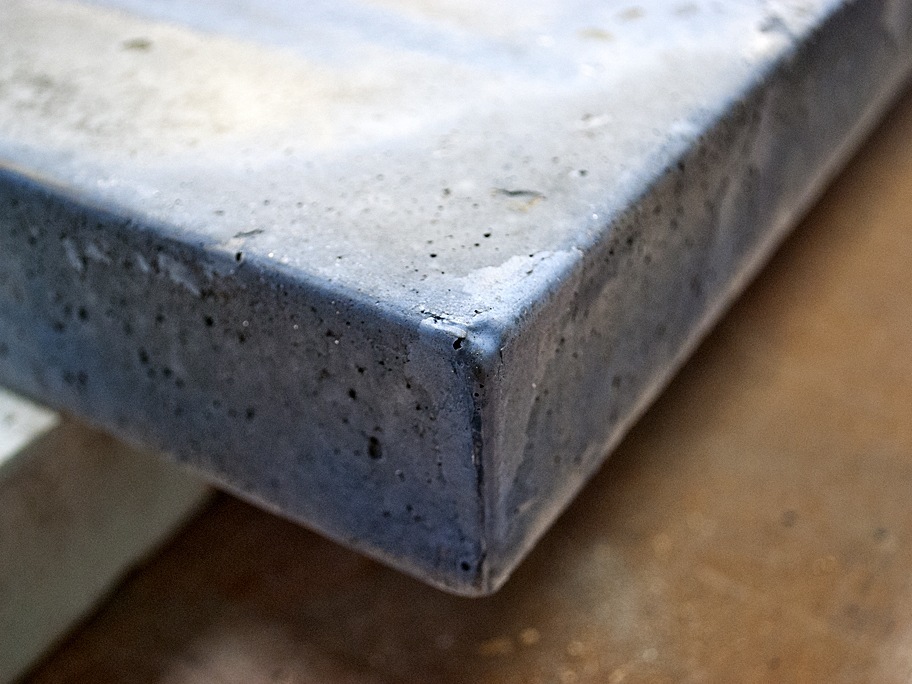
Examples of Concrete Countertop Edges
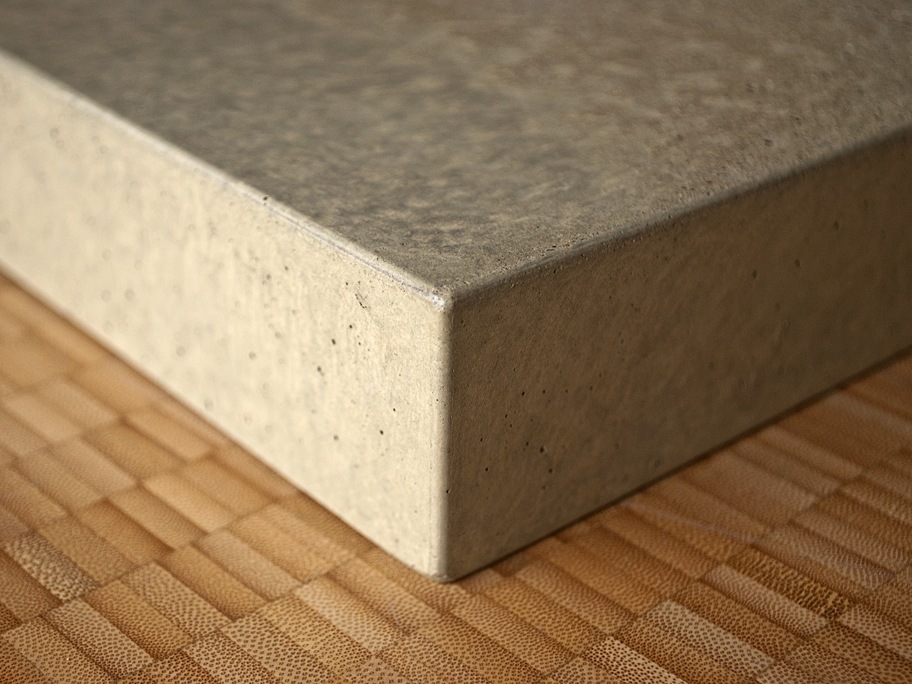
-
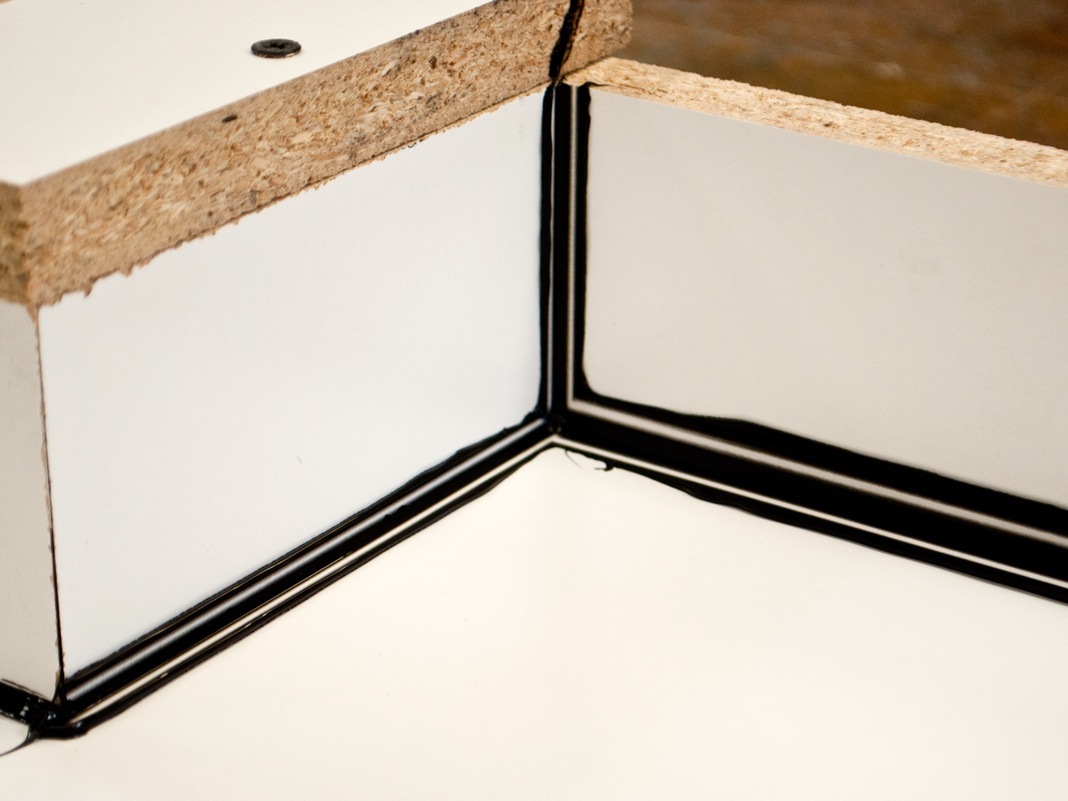
This example shows work from trainees using these techniques for the first time. The small indentation in the corner is a common issue caused by uneven bumps in the silicone. To avoid this, apply consistent pressure on the tool when smoothing the silicone.
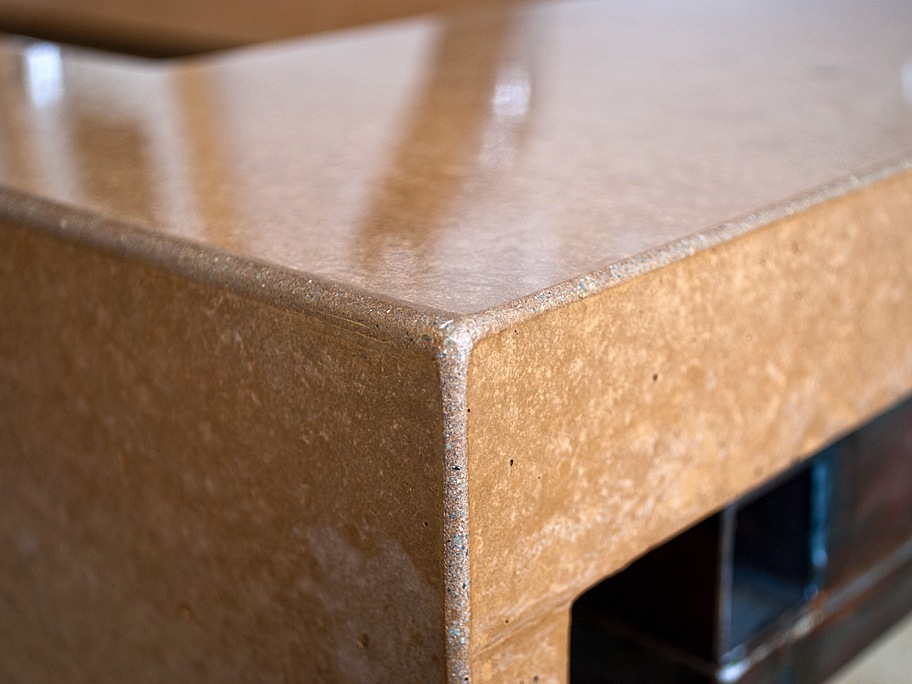
-
This sample piece features a cast finish, taken directly from the form. The edges were carefully inspected and prepared by a fabricator before the pour began.
-
The edges of this piece were hand-sanded with diamond pads, revealing a contrast between the cast surface finish and the exposed aggregate along the edges. While minor blemishes can be repaired, fully re-profiling an edge by hand is time-consuming, so selecting the right tool size from the start is essential.