Bent Concrete Side Table

TWO: MIX RUBBER

Polytek 75-60 Polyurethane Mold Rubber provided the ideal flexibility for this project. The 75-60 was stiff enough to hold our desired shape without kinking at the curves while a softer mold rubber would have bellied or sagged at the curve points.  Work quickly when mixing polyurethane mold rubber in order to avoid having the material setup before pouring.

What You’ll Need

Step 1 – Calculate Rubber Quantity

  • You want to mix up enough rubber to fill the form, but you don’t want to have excess leftover because it’s expensive. If you have a simple shape, calculating the volume will be easy, and there are many volume calculators online.
  • Break the mold down into separate shapes if it’s complex. Calculate the volumes individually, and then add them together.
  • Volume = Length x Width x Height
  • Modeling the rubber mold in a program like Sketchup. If the model is solid, you can right click “Entity Info” and it will give you the volume. With 1″ thick walls and a 1/4″ thickness on the back side, the volume of the rubber mold is 357 cubic inches.
  • The specific volume of Polytek 75-60 Polyurethane Mold Rubber is 27 cubic inches per pound. This number will vary depending on what type of rubber is used.
  • 357 / 27 = 13.2 lbs. of rubber.
  • Assuming that some rubber will be stuck to the inside of the mixing buckets, you should mix up 15 – 16 lbs. to be safe.

Step 2 – Mixing Rubber

  • Double bucket mixing: One way to ensure that you will not have any unmixed material in the final form, is to use the double-bucket mixing technique. Part A and Part B are first mixed in a 5-gallon bucket (white in the pictures of step 3 below). They are then transferred to a second 5-gallon bucket (grey in the pictures of step 4 below) for final mixing.
  • Part B of the Polytek 75 series is more fluid than part A. Weighing Part B out first will make it easier to scrape the sides of the bucket after Part A has been added. This mold took 7.5 lbs. of Part B.

Step 3 – Add Part A to Part B

  • Add 7.5 lbs. of Part A for a total of 15 lbs.
  • First Mix: Blend Part A and Part B together using the corded drill. Scrape the sides and bottom of the bucket with the spatula and continue blending for a few minutes.

Step 4 – Second Mix

  • Pour the rubber into the second 5-gallon bucket and resume blending. Scrape down the sides and bottom of the bucket just like before. Total mixing time shouldn’t be longer than 7 minutes.
  • Working Time: After the rubber is mixed, begin pouring it in the form. There’s no time for standing around or cleaning stuff!

Step 5 – Dry Gas Blanket and Cleanup

  • Spraying a dry gas blanket over the rubber will help extend the shelf-life of the material.
  • Cleaning up the rubber is actually pretty fun because it will just peel off after a few hours.
Previous: Make Mold

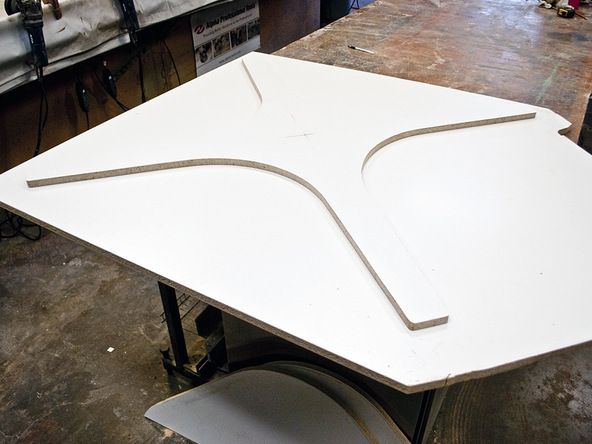
This project begins with a 3/4″ thick template made of melamine coated particle board which will be encased in polyurethane mold rubber to create a flexible mold.

Next: Cast Rubber Mold

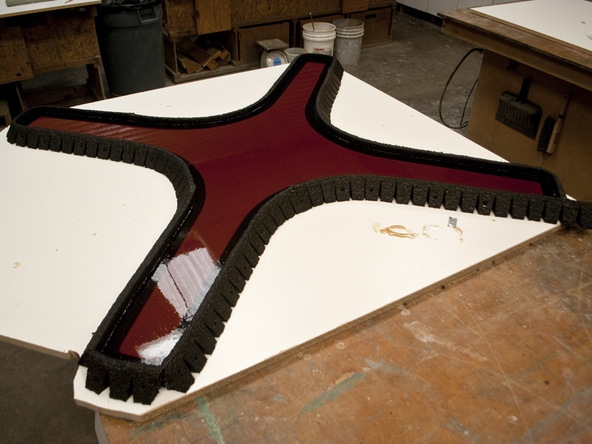
Polyurethane mold rubber behaves like glue and will stick to most materials, so make sure that all surfaces are protected with Pol-Ease Mold Release.