Precast Concrete Countertops

TWO: BUILD THE MOLD

There are many different mold methods to choose from when planning your concrete countertop. Everything from plywood to plexiglas and sheet metal to fabric have been used for good reason.

In this guide we’ll introduce you to the most common concrete countertop forming method – melamine-coated particle board. It’s inexpensive, readily available and most importantly… it’s pre-sealed!

The plastic coating makes an ideal casting surface for projects which are destined for the polishing process. Once the countertop is removed from the mold, there will be a subtle “orange peel” texture to the concrete which is removed with the quick action of a wet-polisher and diamond polishing pads.

Step 1 – Getting Started

  • This sample project is used in CHENG’s 1-Day Concrete Countertop Essentials Class. It’s designed to demonstrate many of the most common details used by today’s concrete countertop fabricators.
  • The mold base, walls and cutting board knock-out are 3/4″ melamine-coated particle board.
  • The sink knock-out is made of 2″ rigid insulating foam: available from Dow (blue) or Owens Corning (pink).
  • For this project we’ve cut the mold base to the exact shape of the project. However, if we were to place the form walls on top of the mold base, we’d avoid cutting the base and simply trace the template onto the base. Select the method you’re most comfortable with.
  • Before attaching the mold walls to the base, take time to drill pilot holes through the walls and into the base to prevent splitting the forms.

Step 2 – The Sink Knock-Out

  • This project has an under-mount sink, so the quality of the sink knock-out is very important. The concrete around this sink needs to look good when the project is complete.
  • Follow the sink template that accompanied your sink to ensure the shape of the knock-out is accurate.
  • We used a bandsaw equipped with a circle-cutting jig to cut this round knock-out.
  • Use a 90º sanding jig to clean up the edges and ensure the square before wrapping the entire knock-out in glossy form tape.
  • Attach the sink knock-out to the mold base with a bit of silicone sealant.

Step 3 – Cutting Board Recess

  • Cut a 3/4″ knock-out to create a recess designed to receive a cutting board. This method is similar to making a drainboard knock-out.
  • Seal all exposed particle board edges with edge banding or packing tape. Wet concrete cannot come in contact with the raw wood. The water in the concrete will cause the concrete to swell and deform the concrete surfaces.
  • This photo shows edge banding being applied to the knock-out before it is placed into the mold. Clear packing tape can also be used, but doesn’t leave the concrete with as nice of a finish.
  • Place a few dabs of silicone on the bottom of the knock-out and press it down into place.

Step 4 – Sink Notes

  • Sinks come in all shapes and sizes but there are a few design considerations that should always be followed:
  • The front of the sink opening should typically be no more than 4-5″ away from the front edge of your countertop. For a typical person, reaching from the countertop edge to the faucet fixtures starts to become uncomfortable over 5″.
  • When wrapping the sink knock-out with glossy form tape, there will be a visible seam where the two ends meet up. Place the sink knock-out in such a way that this seam is hidden in the front of the sink.
  • The red sink form shown in these photos is a fiberglass form that can be reused over and over to create concrete sinks.

Step 5 – Plumbing Penetrations

  • Most faucet fixtures are designed to penetrate a 1-3/8″-thick countertop. Since our countertop is 2″ thick, we’ll need to create a void in the underside of the countertop so a plumber can properly attach the faucet to the countertop.
  • Mark the centerline of the plumbing penetration onto the mold base. 2-3″ from the edge of the sink is typical for most fixtures, but you should follow the fixture manufacturer’s recommendations since some faucets can deviate from the norm.

Step 6 – Seal the Mold

  • Use only 100% silicone sealant for this step. Sealants with acrylic or other components can stick to the cured concrete and in some cases leave unsightly stains.
  • Practice this technique a few times on a sample mold before taking on a full project. We think it’s really important to get this right and create a clean edge with the silicone to avoid sanding and shaping cured concrete after removing the countertop from the mold.
  • Place an even bead of sealant into all corners of the mold and smooth with the 3/8″ acrylic seam-shaping tools.
  • Scrape up the excess silicone with a fresh razor blade, or wait for the silicone to cure and then pull up the lines.
  • Clean any leftover residue with denatured alcohol.

Step 7 – Decorative Aggregates

  • Lightly mist the bottom of the form with spray adhesive. We’ve found that 3M’s Super 77 works well.
  • Be careful and don’t create puddles of adhesive on the mold. These will create unsightly depressions in the finished concrete. Remember, this is a MIST of adhesive.
  • Sprinkle the decorative aggregate on the surface, and use a little bit more than you think you’ll need because some of it will be lost during casting. We estimate that 20% of the aggregates will be displaced during the casting.
  • If you are placing any other decorative details into the mold, this would be the time to place them as well.

Step 8 – Reinforcement

  • There are many options when it comes to reinforcing, and for this project we’ve decided to use a combination of 5″x5″ welded wire mesh and 3/8″ rebar. Other popular choices include masonry ladder wire, basalt rebar, fiberglass rebar and even carbon fiber.
  • Bend a perimeter loop of 3/8″-diameter rebar inside the mold. Maintain a 1″ distance from the form walls to avoid trapping air along the walls.
  • Tie off a sheet of off 5″x5″ welded wire mesh to the rebar frame and suspend 3/4″ from the top of your form. Trim all excess wire to avoid scratching the form walls.
  • Use tie wire to suspend the rebar and mesh as shown.
Previous: Make a Template

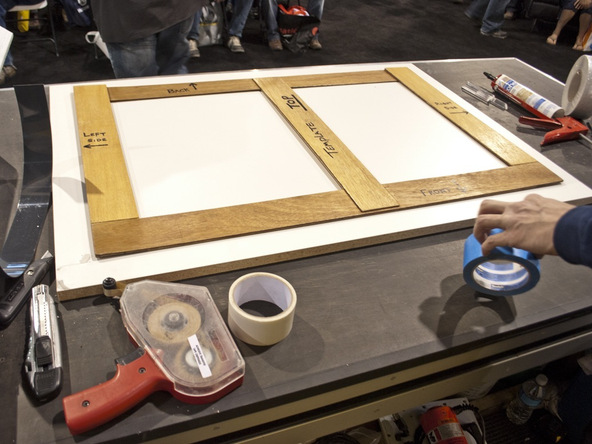
Every countertop project begins with an accurate template.  Detailed notations, measurements, and planning will help your project flow as smoothly as possible.

Next: Mix the Concrete

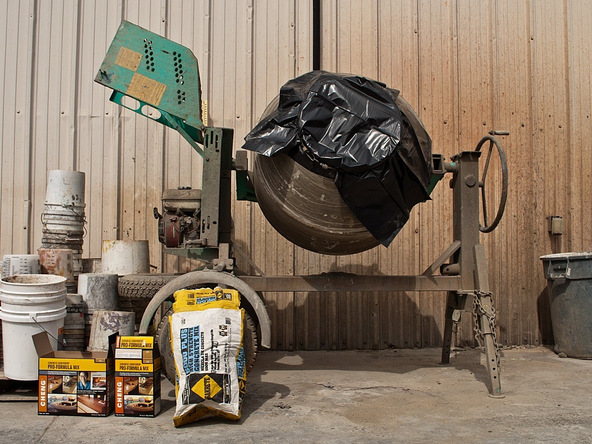
Keep your costs low with Sakrete 5000 Plus concrete from your local home improvement center, and CHENG Pro-Formula Concrete Countertop Mix.

Leave a Reply

Your email address will not be published. Required fields are marked *